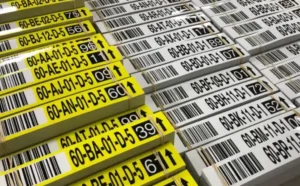
Installing warehouse labels on racking and shelving might seem straightforward, but without a very rigorous method, mistakes can happen. And when they do, they’re a nightmare to correct!
In this guide, we’ll walk through the key steps to successfully label your warehouse, avoiding errors and ensuring a result that will streamline your warehouse’s operations.
Step 1: Plan and Organise
Before you start applying labels, it’s essential to be well-prepared. Begin by laying out the labels in order in front of you, based on the specific design and location where they’ll be installed. This includes aisle markers, rack labels, and any other warehouse signage. Make sure you get them into aisle order as best you can and ensure that you’ve familiarised yourself with everything.
Having a clear drawing or plan of your warehouse layout can be very helpful, so you know exactly where each label should go.

Step 2: Gather the Right Tools
To ensure a smooth installation process, we recommend using a few tools:
- A measuring stick that is slightly shorter than the beam or shelf.
- A marker (Sharpie or biro) to mark where labels will be placed.
- A rag to clean the beam surface before applying the labels.
- A cordless drill driver if you’re using Tek screws to install aisle markers.
Having these tools ready will save any back and forth and help you avoid delays.
Step 3: Familiarise Yourself with the Racking
Before applying any labels, take a few moments to walk through the racking and shelving system. Cross-reference your layout with the actual structure to ensure everything matches. This is especially important if you’re working with a team or installing for a client.
Step 4: Label Positioning
The next step is to determine the placement of the labels on the beams themselves. Commonly, labels are placed either under the pallet or towards the end of the frames, as per the schema below.

Once you’ve established the placement of your labels, make sure to involve stakeholders or your client, depending on whether you are the end-user or the installer, to confirm the final placement. Changing labels afterward can be time-consuming, costly and difficult.
Step 5: Measure and Mark
Once you’ve agreed where the labels are going to be installed, you will need to do some measuring.
Using your measuring stick or template, work out where each label will be placed. Record the measurements carefully to avoid mistakes later. Mark your stick with the precise position of the label against the beam. If the racking is already in use and has pallets on it, consider using magnets to secure the measuring stick to the beam. This will free up your hands for label application.
Be sure to always position the stick consistently (we advocate always pushing it to the left-hand side of the bay). This ensures uniformity, so when you finish the job, all labels will be perfectly aligned.
Top tip! Be sure to make clear, defined markings and to mark your stick all the way around. This will make it easier to use those reference markings over and over.
Step 6: Clean the Surface
Before applying any labels, use your rag to wipe the beam or shelf edge. Removing surface dust is critical for the adhesive to bond effectively. The cleaner the surface, the better the adhesive will stick, ensuring a long-lasting installation.

Step 7: Tabbing Out for Efficiency
To speed up the process, consider “tabbing out” the labels. This involves placing several labels on the scissor lift or nearby surfaces before applying them. Tabbing out reduces the amount of time and motion required, so it helps speed up the installation.
Step 8: Install the Labels
With your measurements in place and surfaces cleaned, it’s time to install the labels.
Apply consistent pressure across the entire label, ensuring that all corners are firmly attached. A common mistake is missing the corners, which can lead to peeling over time.
If you’re installing with a team, agree on a consistent position for each label. For example, if your beam is 80 or 90 millimetres thick, and you have a 60-millimetre label, it’s worth considering whether you’re going to place the label towards the top of the beam, in the middle, or towards the bottom. This will ensure that the labels are consistently placed throughout the whole warehouse.

Step 9: Review the First Bay
We highly recommend completing one bay first, then stopping and taking a step back to review your work. Is this the result you were hoping for? Does it look uniform and consistent?
Make sure everything is aligned and looks the way you intended. If you’re working for a client, this is a good time to get their approval before continuing. Fixing mistakes early will save you time, money and effort.
Tips to Avoid Common Mistakes
At ELAN, we’re proud to say we’ve been labelling warehouses for over 25 years! Over the years, we’ve learned some tips and tricks on how to finish an installation quickly, and crucially, without making any mistakes.
- Aisle markers first: Install aisle markers first to ensure you can cross-reference them while applying the rest of the labels. This will help you avoid labelling the wrong aisle with the wrong reference number.
- Don’t skip a bay: take it from us… this common mistake can be incredibly frustrating! As you work down the aisle, periodically check that you haven’t missed a bay. Check again once you’ve reached the end.
- Dealing with half-bays: In some cases, you can come across half-bays (narrower racking sections). If that’s the case, please don’t hesitate to contact the office and we’ll happily remake those labels for you in a different size. If you’re dealing with a split base label, feel free to cut it in half using scissors.
- Rough surfaces: If you encounter a beam with a rough surface that doesn’t allow the label to stick properly, reach out to us and we’ll happily supply a replacement label with a thicker adhesive, designed for rough textures.
So there you have it! You should now have enough knowledge to be able to label your warehouse yourself. Remember, labelling racking and shelving is a task that requires careful planning, attention to detail, and consistency.
By following these steps and tips, you can ensure a fast and easy installation process, whilst minimising mistakes and ensuring the longevity of the labels. More importantly, you’ll help your warehouse operations to run smoothly.
If you run into any issues or need assistance, don’t hesitate to contact us for support. Happy labelling!